Looking for ways to increase your online visibility, connect with your audience, and maybe earn a little more on the side?
Starting a blog could be exactly what you need. Writing blog posts as a business can help build trust between your target audience and your brand. Blogs are also an excellent outlet for self-expression if you’re a budding writer or have a hobby you want to document and share with others.
We’ve compiled this comprehensive and beginner-friendly guide on how to start a blog so that you’re set for success from the start. We’ll discuss everything from finding a niche, choosing and setting up a blogging platform, publishing content, promoting your blog, and more.
What Is a Blog and Why Should You Start One
A blog, in its early stages, was often an online journal written by an individual chronicling their life or hobby. Today, however, starting a blog is common for brands and people alike, and it’s often a crucial part of a content marketing strategy.
The reasons for starting a blog will vary from person to person and brand to brand. But if you’re looking for an extra nudge, here are some reasons why you need a blog:
- Self-expression. A blog is a medium to write and share your thoughts on a specific topic. This process is exciting and therapeutic for many people.
- Connecting with people. Running a blog allows you to reach new people, build a blogging community, and make friends. If you’re a professional, it’s a great way to network with other experts within your industry as well.
- Making money. There’s no denying that blogging has become a lucrative online business. It’s a flexible and mostly risk-free idea for a side hustle.
Learning new skills. By building a blog, you’ll improve your skills and learn new ones, including writing, marketing, SEO, and web development.
How to Start a Blog in 9 Simple Steps
If you’re looking for a quick guide on how to start a blog and make money online, here are the eight steps you should take
- Choose your niche
- Choose a name for your blog
- Get hosting and a domain name
- Choose your blogging platform
- Create your blog with WordPress
- Create content
- Run a pre-launch campaign
- Publish content and grow your blog
- Monetize your blog
In the upcoming sections, we’ll break down each step in the journey of how to make a blog for beginners and provide more details.
1. Choose Your Blog Niche
A niche is a specific topic that your blog will focus on, and it’s key in determining your target audience. A strong niche also helps you pick the name for your blog and develop a focused blogging strategy.
Examples of blog niche ideas include writing about books, travel, gaming, photography, and food.
When setting up your new blog, it may be tempting to cover a broad range of topics. However, trying to master every subject out there is incredibly difficult and unsustainable. You might pull off a few successful quality blog posts, but your audience will be scattered, making it hard to maintain a loyal readership.
That’s why sticking to a niche that can get a devoted following is important. A dedicated audience will look forward to your next piece of content, giving your blog a steady stream of traffic.
To find the perfect niche for a successful blog, keep the following tips in mind:
- Pick a niche that you like or are passionate about. Writing about a topic you enjoy will always be more fulfilling than forcing yourself to write about something you’re uninterested in.
Think about your hobbies, interests, or topics you’d like to learn more about. If possible, make them more specific, like focusing on a particular cuisine (Japanese, Mexican, Italian) over blogging about all things food.
Or you could run a book blog focused on reading on a budget or in particular literary styles.
- Pick a niche that has audience potential. There should be a level of pre-existing interest in your chosen topic to ensure you’ll have an audience to write to.
Use Google Trends to find the search volume of specific keywords related to your niche and determine whether people are talking about it on social media and community forums.
This way, you’ll know what’s trending in your niche and which blog post ideas you can immediately disregard.
- You don’t have to be an expert to profit from a niche. Being a topical expert has a certain authority many readers look for, but it’s not a requirement. What’s more important is having a unique perspective on your topic and being keen to learn more.
For example, you might not be a professional photographer, but you can still start a blog about getting into photography as a beginner.
If authority seems essential for your idea, you can feature interviews with experts on your blog.
2. Choose a Blog Name
Many “how to start a blog” guides swear by a thought-out blog name. And rightly so – look at any successful blog, and you’ll notice that they often have a catchy and unique name.
But how do you go about brainstorming a name for your blog and knowing whether it’s any good?
A good blog name should be:
- Related to your niche. Ideally, readers should know your niche from your blog title.
- No longer than 2-3 words. While some blogs with long names are highly successful, we recommend keeping yours short and sweet.
- Easy to spell and remember. Like your domain name, the name of your blog should pass the “bar test” –meaning that, even if shouted over a table in a busy bar, it should be easy enough to spell and remember.
Thankfully, you don’t have to spend ages staring at your notepad and waiting for inspiration to hit. There are various blog name generators you can use, often free of charge.
All you have to do is give the generator a few keywords to work with, and the AI will come up with different names for your blog. Simply choose the one you like the most, or combine a few suggestions, and your new blog name is ready.
3. Get Web Hosting and a Domain Name
Once you’ve settled on a niche and a name, it’s time to start preparing a website for your blog. Securing web hosting and a domain name are two of the most important steps for getting any blog online.
Web hosting is a service that allows you to publish a website and all of its files online, making it possible for people to visit it. Purchasing hosting means renting server space from a hosting provider, giving you access to an allocation of resources needed to build a blog and run it.
Most web hosting companies, including Hostinger, offer different types of hosting for blogs. Two of the most popular hosting plans for blogs include:
- Shared Hosting. The most affordable type of hosting. With this type of blog hosting, users share the resources of one server between multiple websites. It’s excellent for small websites like personal blogs. Shared hosting plans start at $1.99/month.
- WordPress Hosting. This type of shared hosting is specially optimized for WordPress websites. If you plan to use WordPress for your small blog, this plan is a perfect choice, starting at $1.99/month.
All of Hostinger’s hosting plans come equipped with a free SSL certificate, 24/7 live support, and are eligible for a 30-day money-back guarantee.
Expert Tip
The big things I look for in a web host are: 1. Convenience. Let’s say you’re using WordPress – does your host let you install WordPress with one or two clicks of a button? 2. Speed. If a host is fast, your site will load faster, which will help with your rankings and traffic. 3. Great support, because it just makes it easier whenever you have a problem
After hosting is set up, it’s time to get your blog’s domain name. Visitors must enter a domain name into the address bar to reach your site. Domain names make it faster and easier to access different websites since, without them, users would need to remember a long string of numbers (your website’s IP address). For example, hostinger.com is our domain name.
To secure a custom blog domain name, purchase it from a domain registrar of your choice. Some web hosting companies, including Hostinger, double as domain registrars. That way, you can buy web hosting and a domain in one go and save time and money.
If you buy hosting for one year or more from Hostinger, you’ll receive a free domain name for one year as well.
When choosing your domain name, try to make it memorable and as close as possible to your blog name. We recommend giving our domain checker a try if you need inspiration for domain name ideas. Using a unique domain extension such as .xyz, .online, .club will also make your blog address stand out – and easier to remember. For example, consider opting for .club domain if you have a membership subscription or want your followers to have a sense of belonging.
Domain Name Checker
Instantly check domain name availability.
4. Choose Your Blogging Platform
Once you’ve purchased a hosting plan and chosen a domain name, it’s time to decide on the blogging platform that your new blog will run on.
Hosted or Self-Hosted?
It’s essential to know the difference between hosted and self-hosted platforms when choosing the right platform for your blog. Otherwise, you could end up running your entire blog on a platform that’s too complex to use or lacks the features that you need.
Hosted platforms are all-inclusive. They usually come with all the tools needed to build a blog. There’s no need to purchase hosting and a domain name separately.
Examples of hosted blogging platforms include website builders like WordPress.com, Zyro, Squarespace, and Weebly. Be careful not to confuse WordPress.com with the self-hosted WordPress.org, however.
The pros and cons of choosing a hosted platform or a website builder for your blog include the following:
Pros
- Quick setup. Hosted platforms are often all-in-one website-building solutions. There’s no need to purchase hosting or a custom domain name separately before building your site.
- Exceptionally beginner-friendly. Using a hosted platform is easy, even for complete beginners. As a result, setting up your blog and publishing your first post is possible with just a few clicks.
- Dedicated support. Many hosted platforms have a dedicated support team you can contact over live chat, email, or phone.
- No maintenance work. The platform handles the security and backup of the site – you can focus on publishing and promoting your blog.
Cons
- Limited control. You must abide by the platform’s rules and restrictions. Exercising complete control over your site and hosting resources isn’t possible.
- Limited ownership. Your blog and its content are stored on the platform’s server, so you don’t fully own them.
- Inflexible. Most hosted platforms are built on a closed-source system. The templates and add-ons are usually limited to what the service officially offers. Additionally, migrating to another platform is often impossible – you may need to remake the website from scratch.
- Difficult to scale. Hosted platforms aren’t designed to handle massive websites. If your blog grows, you might need to consider moving to a self-hosted platform instead.
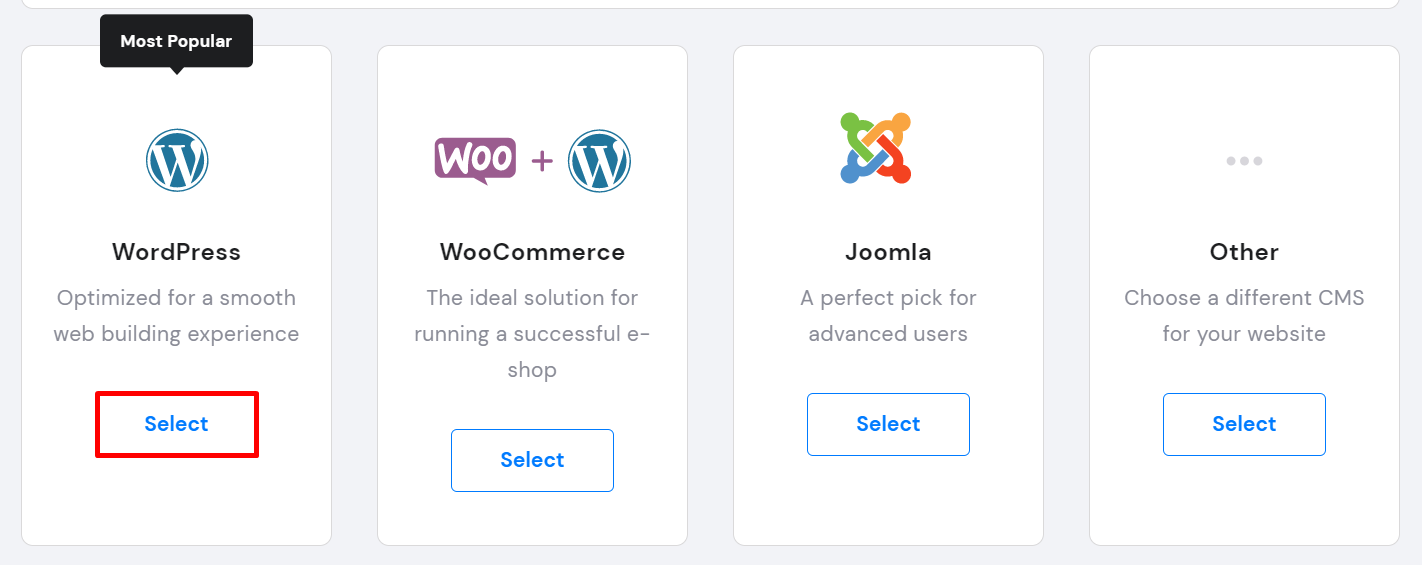
Alternatively, you’ll have to purchase blog hosting separately if you go for a self-hosted blog. Most often, the commonly used self-hosted platforms are content management systems such as WordPress.org, Drupal, and Joomla.
A content management system (CMS) is software that allows users to build a website and manage it through a graphic user interface. It enables people to create websites without having to code them from scratch.
The main pros and cons of having a self-hosted platform or a CMS include the following:
Pros
- Complete control. You’re free to adjust the settings and manage the resources of your hosting – it all depends on the hosting plan you have chosen.
- Seemingly endless customization. With a self-hosted platform like WordPress, you’re free to choose from thousands of WordPress plugins and themes from the official directory or third-party sources.
- Complete ownership. You fully own your blog and its content because you’re renting the space they’re stored in.
- Built to scale. Self-hosted platforms can sustain websites of any size as long as your hosting plan has sufficient resources.
Cons
- Steeper learning curve. Even though using a self-hosted platform is significantly easier than hand-coding a website from scratch, it still requires some technical knowledge compared to website builders.
- Requires some time to set up. Unlike the instant setup of most hosted platforms, self-hosted platforms require extra steps like purchasing web hosting, registering a domain, and installing the platform’s software.
- No dedicated support. Most self-hosted platforms don’t have customer support. However, WordPress, being the most popular website platform, has large community support. Many hosting providers also offer CMS-related customer support.
- Must be on top of security and maintenance. You’ll be responsible for keeping your blog secure and properly maintained. This means installing and setting up security add-ons, regular backups, and software updates.
A hosted platform is often the better choice if you own a small website with limited content, such as an online portfolio. However, if your blog has a lot of content and you expect it to grow, a self-hosted platform is the better long-term solution.
Choosing the right web hosting company and plan is important if you opt for the self-hosted platform. Make sure to select a plan from a reputable hosting company that suits your budget and offers a high uptime guarantee, advanced security technology, and comes with all the features you need.
WashaHost.com is an excellent choice if you’re looking for secure and reliable web hosting, including CMS-optimized solutions, at an affordable price. We offer layered protection against DDoS attacks and a 99.9% uptime guarantee. Our hosting plans start at $1.99/month.
5. Create Your Blog with WordPress
As we’ve discussed, there are numerous blogging platforms to choose from. For the most well-rounded experience, however, we recommend starting a blog with the WordPress self-hosted CMS. In this section, we will discuss how to start a WordPress blog in more detail.
WordPress is one of the best CMSs available and an excellent platform for building a blog. Even though it can power almost any kind of website, it was initially designed for blogging. As a result, WordPress has numerous blog management tools and features.
Even though WordPress has a steeper learning curve than most website builders, many available resources help users learn how to become a blogger faster. Once you get the hang of WordPress, its daily management will become much easier.
The first step is to install WordPress on your blog site using the auto-installer provided by your hosting provider through the control panel.
Here’s how to do it on WashaHost Cpanel:

- Navigate to Website -> Auto Installer.
- Under WordPress, click Select.
- A new window will pop up. Fill in the form with the correct details:
- Check your domain name is correct.
- Type in the Administrator Username, Password, and Email. This login information will be used to access your WordPress dashboard or admin area.
- Enter your Website Title. The blog name is usually written here. It can be changed later from the Site Identity settings on the WordPress dashboard.
- Choose your preferred Language.
- Select Always update to the latest available version to get the latest features and security patches.
- Select Install.
Once the installation is complete, log in to your WordPress admin area. Here, you can begin to make changes to your new blog.
Next, we will focus on how to design and customize a self-hosted WordPress blog. We’ll cover WordPress themes and how to customize them, as well as go over plugins and overall page setup.
Pick a Blog Theme
A WordPress theme is a pre-made design template for WordPress sites that can be customized further. Free and premium options are available in the WordPress library and third-party sources like ThemeForest. Developers also offer premium themes on their own websites, like the Astra theme.
Fun fact – there are over 8,400+ themes available in the official WordPress theme directory alone.
With premium themes, you can expect access to dedicated support, regular updates, and premium plugins bundled with your purchase. While free WordPress themes might be enough for some successful blogs, they usually include little to no support, making premium themes worth the investment.
When looking for the best theme for your blog, consider these crucial factors:
- Pricing. If you’re eyeing a premium blog theme, make sure that the theme is worth its price. Compare it to other similarly priced themes.
- Appropriate design. The design of the theme should fit the content of your blog. When in doubt, always prioritize simple designs that elevate each blog post.
- Features. Check whether the theme you want includes features like a drag-and-drop builder, premade layouts, and customer support.
- Responsiveness. Use a responsive theme that’ll adapt to any screen size – over half of all website traffic comes from mobile devices.
- User reviews. Before getting a theme, read whether people have had a positive experience with it.
To install a theme from the WordPress directory, log in to your dashboard and navigate to Appearance -> Themes -> Add New. Hover over the theme you want and click Install. Once the installation is complete, Activate it.
To install a theme from a third-party source that you’ve downloaded, select Upload Themes, upload the .zip file of the theme, and then install and activate it.
Design Your Blog
After activating your chosen theme, it’s time to adjust the blog design further.
The rule of thumb is to aim for simplicity. Remember – the main selling point of a blog is the content. You want to make sure that the reading and browsing experience will be sufficient for your visitors.
Consider applying these tips to achieve the best look for your blog:
- Install a drag-and-drop page builder plugin. Plugins like Elementor or Beaver Builder for a more intuitive design experience.
- Focus on the experience. Pick color combinations, layouts, and fonts that create an enjoyable user experience.
- Include visual content. Add an image gallery to make your blog content more engaging.
- Incorporate a logo to solidify your blog’s brand. You don’t have to create one from scratch or hire a graphic designer – use free logo makers instead.
- Use icons in place of text when appropriate. They make your site more visually appealing. Social media buttons are a good example of this.
- Learn and be curious. Study different resources on web design inspiration if you’re feeling stuck.
If you wish to delegate the task of designing your blog, you can hire a web designer.
Install Plugins and Tools to Extend Functionality
A WordPress plugin is code that extends a website’s functionality. Plugins provide extra features and can be installed, adjusted, and removed quickly. And the best part is that managing plugins requires no coding knowledge.
Different plugins serve different purposes. Some increase site security, while others perform backups, receive contact forms, moderate comments, or add Google Analytics.
We recommend you check out the following essential plugins:
- iThemes Security. This plugin extends the security features of a WordPress site.
- UpdraftPlus. Use this plugin to simplify backups and site restoration.
- WPForms. With this plugin, you’ll be able to create forms easily.
- Akismet Spam Protection. As the name implies, this extension helps combat spam.
- MonsterInsights. This plugin links a site with a Google Analytics account.
Like with themes, there are great options for both free and premium WordPress plugins. Premium ones usually offer extra features and support. Some plugins are freemium – this means there is a free version with basic features available that can be upgraded by paying for the premium version.
Before choosing a plugin, make sure to check its user ratings and reviews first. Some plugins lack regular updates and other essential features or have been coded poorly in the first place. It’s safe to assume that a plugin with high ratings and many downloads will work well.
We recommend installing only the most necessary plugins, as having too many of them can slow your site down. Keeping a large number of plugins updated will also be tougher. If you use shared hosting, try to have up to five active plugins at a time to get the most out of your web host.
Log into your WordPress admin dashboard and go to Plugins -> Add New to install a plugin. Browse or search for the plugin you want, then install and activate it.
Uploading a third-party plugin file is similar to uploading a theme – simply select Upload Plugin.
Create the Necessary Pages
Website pages contain the static content of a site. Unlike posts, a website or a blog page requires little to no edits or updates. The most common types of pages on websites are the following:
- Homepage. Your homepage is the introductory page of a website. This is what your visitors will see when they enter your domain name into their browser’s address bar. The homepage should include snippets of your best and latest blog posts.
- About page. This is the section of your site where visitors can learn more about the person behind the website or the brand in question. This page may include a bio, the objectives of the site, and representative pictures.
- Contact page. This page contains information on how to get in touch with the website administrator. A contact page usually includes an email address, a phone number, links to social media profiles, a contact form, or an address with its location on Google Maps.
Different types of blogs may need specific types of pages. For example, if your blog features an online store, you may need to add product pages to your website.
To create a page, open the dashboard and go to Pages -> Add New. You will be taken to the WordPress text editor. Use it to write and format the page copy and add relevant images, videos, forms, or any other page elements you want to use.
6. Create Content
After you’ve set up your blog, it’s time to think about the content you will be publishing.
Start by brainstorming different topics and sub-topics that fit your chosen niche. For example, if you want to blog about hiking, your blogging topics could be:
- Hiking gear
- Best hiking routes
- Mistakes people make while hiking
- Hiking advice for different seasons
Once you have a list of topics you want to discuss, expand on each. For example, the sub-topics you could cover under hiking gear could include things like:
- Hiking gear for beginners
- Budget-friendly hiking gear
- Cold weather hiking gear
- Ultralight hiking gear
- Reviews of individual kit pieces
Once you have an idea of the direction you want to take your different topics, it’s time to do keyword research. By checking what people are actually looking for, you ensure your content reaches people – otherwise, you could be wasting time creating content that nobody needs.
Use tools like Ahrefs and Google Trends to help understand what people are searching for and what type of content is already out there.
You should also look at what your competitors are writing about the topic. Pay attention to things that aren’t covered in detail in their articles and focus on including the missing information in your own blog post.
When it comes to the actual writing process of your content, often the best practice is to write a draft and then revisit it at a later date or get an editor to look over your copy. This way, you’ll avoid publishing content riddled with typos or logical inconsistencies.
Pro Tip
Tools like SurferSEO can help you create content that’s search engine optimized from the start.
7. Pre-Launch Campaign and Publish Blog Content
Before you start blogging, it’s essential to take care of the pre-launch campaign. A well-planned blog is more likely to succeed. You’ll have to decide the kind of content you want to publish and your overall posting schedule.
To develop a successful content strategy, follow these recommendations:
- Specify your goals. Avoid setting abstract targets to track your progress. Instead, aim for concrete milestones, such as “have 1000 newsletter subscribers by the end of the year.”
- Identify your target audience. Get to know the common characteristics of your demographic – their personalities, needs, anxieties, and hopes.
- Check out online communities where your target audience meets up. For example, if your blog is about books, check out r/books on Reddit. If you can put yourself in your readers’ shoes when writing, your content will resonate with them.
- Find your competitors. Find out who the main competition in your blog’s niche is. Read and analyze their most popular posts, find out what works for them, and try to find areas where your blog can perform better or offer a unique perspective. This will help you stand out from other blogs.
- List the topics you will write about. When you brainstorm blog topics, consider every piece of information you’ve found regarding your target audience and competitors.
- Perform keyword research to determine the level of interest and the competition for each chosen topic. There must be a strong, data-driven reason for why each topic was selected.
- Schedule your new blog posts. The key to building a loyal readership is consistency. It’s better to stick to a regular schedule rather than churning out many blog posts and disappearing for an extended period.
Expert Tip
You should try to write and post content at least three times a week. Eventually, you should try to get to once a day at least. Try to post in the mornings within your time zone or whatever time zone that you are targeting people, it tends to do better. So if I’m targeting people in Europe, I would do it in the mornings, maybe like 8 AM time in the UK. That way, you can get the email traffic and social shares.
With the pre-launch process out of the way, it’s time to start thinking about writing your first blog posts. Here are some tips to make each new post count:
- Be clear and concise. Use easy-to-understand language and keep sentences and paragraphs short. Avoid large blocks of text that may intimidate readers.
- Use headings, subheadings, and lists. Clever formatting helps readers find the information they need faster, especially if they are skimming through the blog post.
- Add images and graphics. Visual content makes your posts more engaging. Sometimes, they are necessary – especially if you’re writing a how-to guide, for example, or want to convey data in a more digestible form.
- Apply SEO best practices. Use tools like Yoast SEO to incorporate search engine optimization into your writing and publishing process. It can dramatically improve your blog’s visibility on search engines.
To create your first blog post, log in to your WordPress dashboard and navigate to Posts -> Add New. You will be taken to the WordPress text editor – the tool for writing and formatting your content.
The WordPress text editor allows you to add and edit blocks or sections of different types of content. Blocks may include text of various formats, media, design elements, widgets, and embeds. To select and add a new block, simply click on the + button located at the top left of the editor.
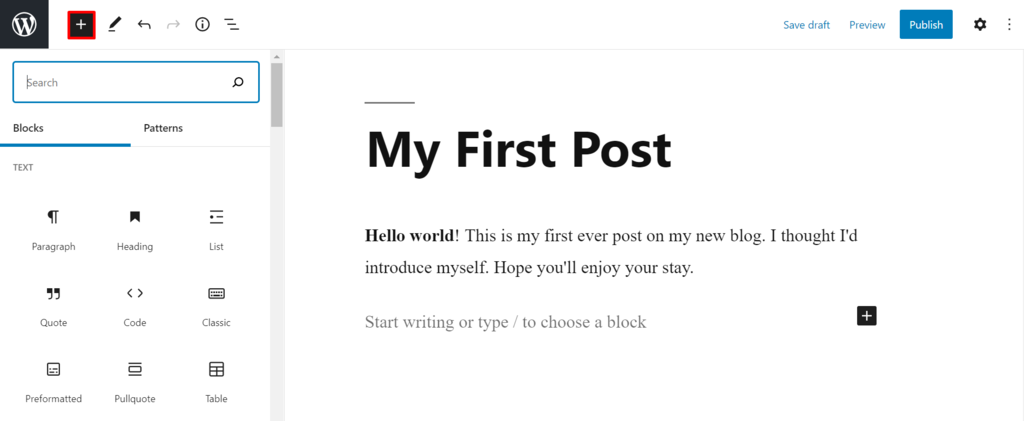
If you want to include a predesigned template in your new blog post, browse the items under the Patterns tab.
Once you’re done writing, formatting, and adding content to your first blog post, make sure the settings are correct before publishing it. To access the post’s settings, click the Gear Icon located at the top right of the editor.
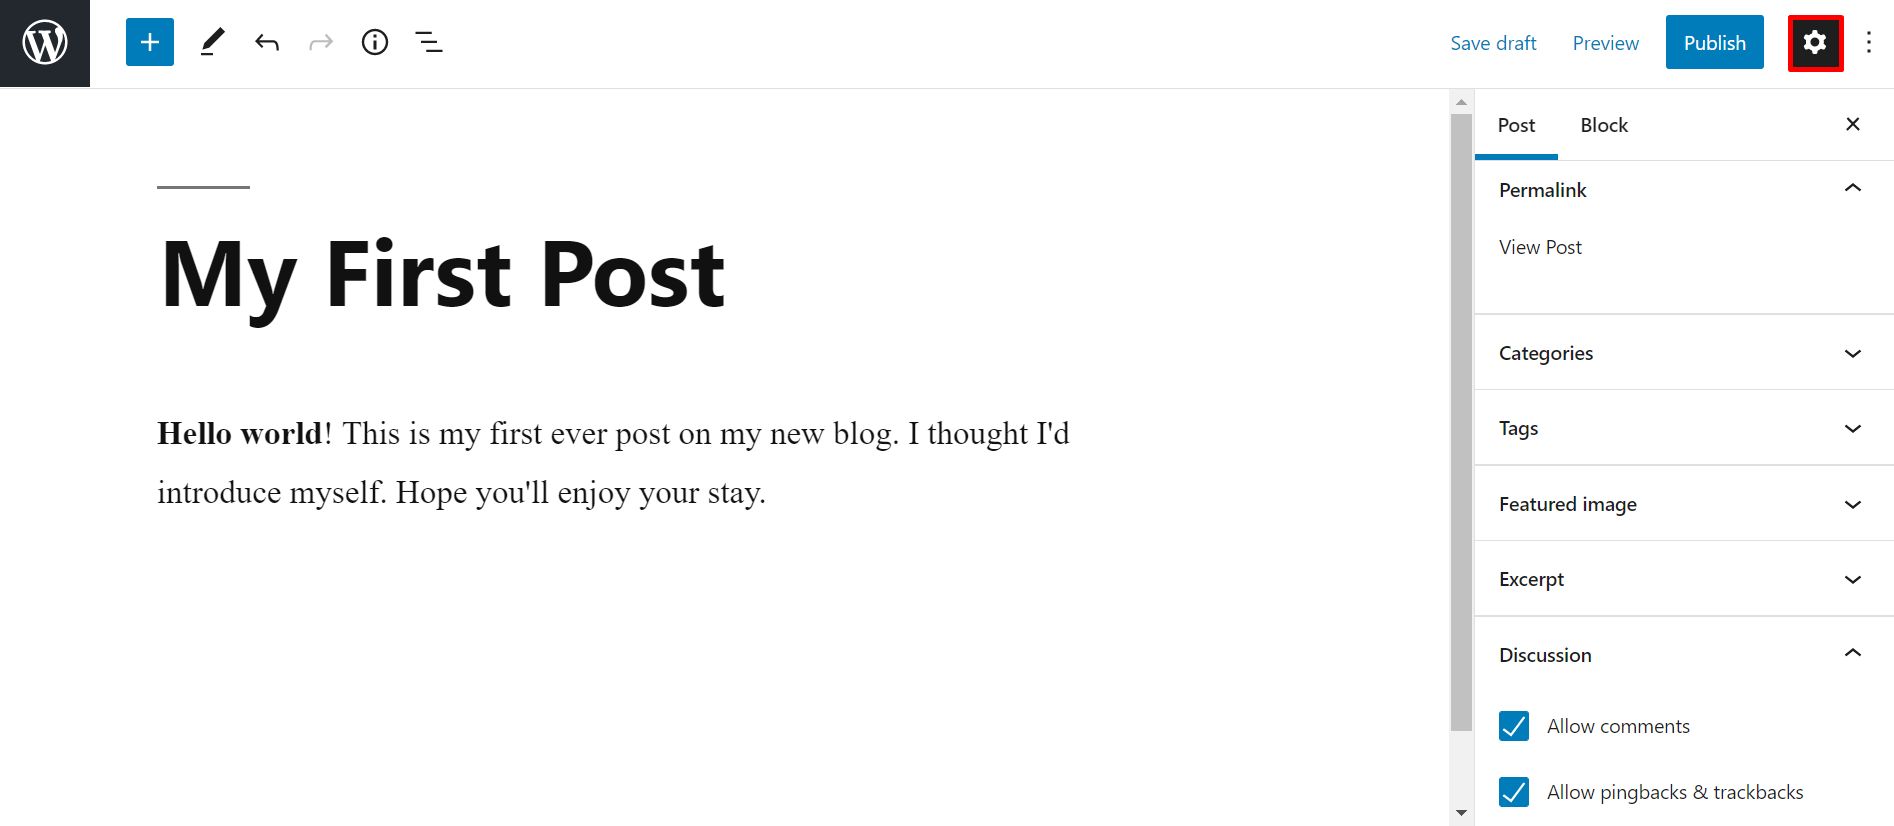
In the settings sidebar, you can choose whether you want to allow comments, add tags, set the post’s categories, or upload featured images.
Before you publish the blog post, Preview it first to make sure it looks exactly the way you want. For example, check that the blog post title isn’t too long and that all paragraphs and images look OK. Go back and edit the post if needed. Once you’re satisfied, proceed to Publish the post.
8. Promote and Grow Your Blog Following
Now that your new WordPress blog is up and running, it’s time to get people to read your blog. Even if you have high-quality content, it won’t matter if it doesn’t reach your target audience. That’s why blog promotion is vital.
Optimize Your Blog with SEO Practices
Search engine optimization (SEO) refers to a set of techniques used to increase the ranking of a website on search engines.
Getting a website to rank high on search engine results pages (SERPs) is essential. According to BrightEdge, 53.3% of all website traffic comes from organic searches. If you have posts and pages ranking high on search engines, your blog is more likely to enjoy a steady stream of organic traffic without having to pay for advertisements.
Here are some of the most common tips for blog SEO:
- Keyword research. To have a better chance of ranking high on SERPs, target specific long-tail keywords with low competition. Use tools like Google Trends, SEMRush, or Ahrefs to gather keyword-related information.
- Sign up for Google Search Console. It’s an essential tool for tracking your website’s performance on Google. It will let you know which keywords bring you the most traffic and which websites link to yours.
- Install an SEO plugin. If you run a WordPress blog, Yoast SEO is one of the most popular SEO plugins. Some website builders similarly have built-in SEO features.
- Apply on-page SEO best practices. Some essential on-page SEO tactics include optimizing images, adding meta descriptions, and changing permalink slugs.
- Increase website performance. Faster page speeds positively affect SEO. Make sure to follow website performance guidelines to speed up your website.
Build Your Blog Audience on Social Media and Online Forums
Promoting your blog on social media and online forums is an excellent way to find your audience and connect with them. Your goal should be to find the communities around your blogging niche and forward them to your blog to drive traffic.
97% of bloggers use social media to share their posts. It’s a popular method to generate traffic, but since everyone does it, the competition is high. Therefore, focusing your time and energy on a well-strategized social media strategy is essential.
The first step is to ensure that you incorporate social media into your own blog. Readers who find your content interesting or valuable will likely want to follow your social media accounts and share your content with others.
If you run a WordPress blog, there are dozens of social media plugins available. Installing them will give you access to features such as social media icon widgets, sharing, Facebook like buttons, and more.
The next step is to pick the social media platforms to promote your blog on.
Each social media platform has its unique characteristics, and not all of them will be suitable for your specific niche. That’s why researching each platform’s demographics before you start promoting on social media is essential.
Here is some information about the most popular social media platforms that can help grow successful blogs:
- Facebook. The biggest social network with 2.89 billion monthly active users worldwide. Men aged 25-34 make up 18.9% of their user base, making them the largest demographic on the platform. 98% of Facebook users access it via mobile, so make sure your blog is also mobile-friendly.
- Twitter. There are 206 million monthly active users on Twitter, and male users dominate the platform by 70%. It has earned a reputation for providing real-time updates on various topics, with over 59% of its users admitting to getting their news from Twitter.
- Reddit. The social news aggregation and discussion platform has over 430 million monthly active users. Reddit’s most popular age demographics are adults aged 25-29, followed closely by young adults aged 18-24. Reddit has over 100,000 active communities for almost any niche, making it a great platform for finding your target audience.
- Instagram. This photo-sharing app giant has around 1 billion monthly active users. Instagram users’ gender demographics are nearly balanced, with 51% of users identifying as female and 49% identifying as male. Adults aged 25-34 and young adults aged 18-24 dominate the platform with 32.8% and 29.6%, respectively. If you have visually appealing blog content and your target audience skews younger, Instagram is an excellent fit.
- Pinterest. The popular social image-sharing platform has over 478 million monthly active users. Female audiences dominate Pinterest, making up 76.3% of its user base. Additionally, the US leads Pinterest usage by a substantial margin. It’s a worthy option for blogs whose audience is predominantly American women.
- TikTok. Crowned as the fastest-growing social network ever, the video-sharing app TikTok has collected about 689 million monthly active users. Gen Z dominates the platform – 41% of its user base being teens and young adults aged 16-24. If your blog content targets young adults, try promoting your brand on TikTok with bite-sized video summaries of your articles.


